Foam Rolling Moves
So, you’ve decided it’s time to bite the bullet and get in shape, lose the gut, tone up the abs and define your thighs. You may have already heard from the big guys that you need a collection of protein powders and energy bars to have the strength to pump some iron. Yes, it is true, but before you hit the gym and start out on the weights, you’d better learn to take advantage of foam rollers that can prepare your body for all the stress you’re going to put it through. Not only does using it warm up your body, it’s the perfect cool down option too.
Don’t Have a Foam Roller Yet?
Buying a foam roller will be one of the best investments you will make – after buying some protein bars, of course. Foam rollers are easily affordable for a start, and at the same time, they maximize your work out and support recovery at the end of your routine. Most gyms have a foam roller but having one at home means you can take advantage of it anytime especially on days when you ache.
Not using a roller correctly can cause more harm than good, especially when you don’t know about the types of rollers available and understand how they affect your muscles. If you’re a beginner, stick with a softer roller to begin with, and then gradually move to a firmer roller once you have the techniques sorted. Once you are competent and ready to push on further, progress to a roller with foam spikes. Here are some moves you can try to get the best results from your foam-rolling routine.
5 of the Best Foam Rolling Moves
The following moves should be done for 15-20 seconds each. If you have discomfort or pain in a particular area, just roll for a little longer at those points in 25-30-second rounds.
Rhomboids-SMR
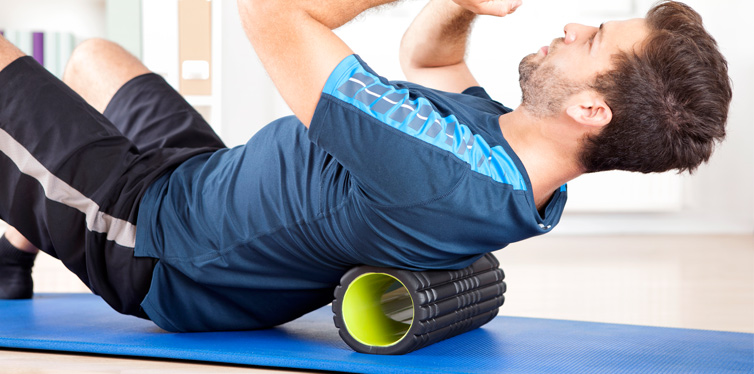
Also called Foam Roll Upper Back and Myofascial Release Rhomboids, this is a stretch designed to impact your middle back muscles and strengthen them. It’s a great move for beginners but it’s a good idea to master the technique under the watchful eye of an expert before going at it alone.
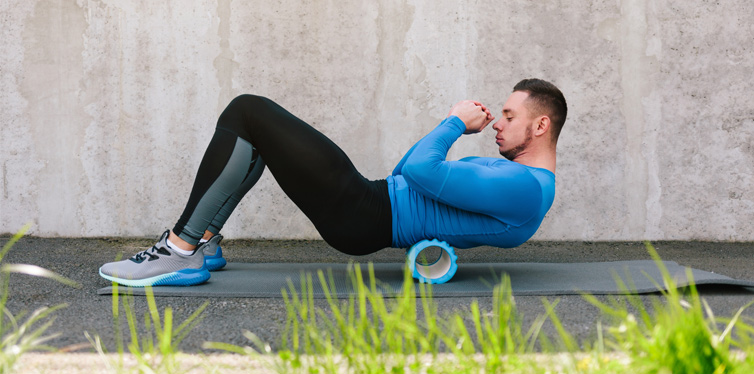
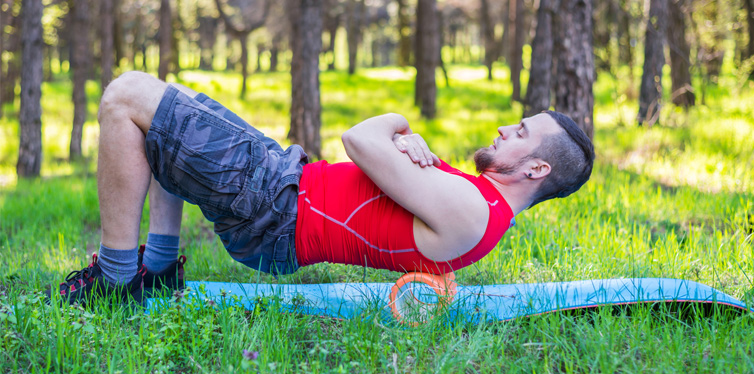
- To start, lie down straight with the foam roller comfortable under your upper back. Cross your arms to feel a stretch across your shoulders.
- Slowly raise your hips from the ground and shift your body weight onto the foam roller. Continue slowly shifting your weight from side to side while at the same time rolling over the foam from your upper to your middle back. It takes some time to master the art but be patient. It will be worth it.
- If you find a point of discomfort or tension, pause over it, count to 30 and then shift your weight again.
Calves-SMR
This stretch is perfect for preparing your calf muscles for the gym and for jogging or running too.
- For this one, you start in a sitting position. Place the foam roller under your lower leg to support the calf. You can either cross the other leg over or leave it flat on the floor, how you get that bit of comfort is up to you.
- With your hands to the side or behind you press down into the floor to raise your hips. This will shift the weight onto your calf muscle, and then slowly, roll your leg down the foam from just below your knee to your ankle.
- Release and repeat the technique for your other leg. Continue for several moves, alternating legs as you go.
Groin Roll
- Lie face down. Keep one leg on top of the foam roller and against your inner thigh.
- Shift your weight onto the foam roller. Relax your inner thigh muscles and gently roll over the area between your hip and knee. Hold for 10-30 seconds at the points of pressure.
- Repeat for the other leg and continue to alternate for several more moves. Aim to always exercise limbs equally for a balanced muscle tone and strength. Don’t leave yourself wonky by favoring one leg over another, it will lead to back and hip issues.
IT Band Roll
-
Lie down on the floor on one side and place the bottom leg onto a foam roller between the hip area and the knee. This time keep the top leg crossed over in front of you.
- Shift as much weight on to the bottom leg as is possible. Slowly, roll your leg over the foam from hip to knee and back. Just as before, hold the position over any areas of tension or discomfort for 30 seconds or so.
-
Repeat the roll for the other leg then continue to alternate for several more moves.
Hamstrings Roll
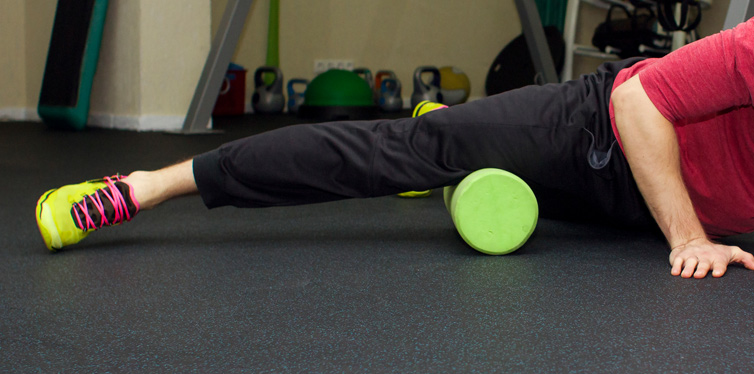
- Sit comfortably on the floor. Extend both your legs over the foam roller and position it just above your knee. Put your hands on the floor at your hip or just behind you to support your weight.
- Slowly, press your hands against the floor and lift your hips. Now shift your weight from the foam roll to your legs. Relax your hamstrings and gently roll over the foam from your hips to your knee and back.
- As usual, repeat for the other leg and continue to alternate for several more moves.
Do You Want More?
You can certainly get started with these five moves, but here is a bonus to help you make most out of your foam rolling routine.
Quadriceps Roll
- Lie on the floor, face down, and place the foam roller under one leg and support your weight by putting your forearms under your chin, and then raise the foot of the leg on the roller.
- Keep your foot up and roll the leg from knee to the hip and back, and in the process shift as much weight onto the leg as you can bear.
- You get what to do next but just in case. Repeat the move with the other leg, alternate and continue for several more.
It’s Working – The Reasons to Use Foam Rollers Regularly
Make a promise to yourself to use the foam roller before and after every workout and you will feel your overall performance and stamina improve gradually. You gain flexibility as your muscles benefit from the increased targeted blood flow banishing forever that nasty post-workout ache that puts so many men off exercise.
Using a foam roller regularly will also help improve flexibility and mobility, especially when you use it during your warm-up session. The whole purpose of a warm-up is to prepare your muscle for vigorous activity, and foam rolling directs more blood to the muscle tissue, it warms it and loosens it enough to be able to take extra stretch and strain without causing damage to soft tissue, tendons or joints.
Using the roller, you can target those areas where muscle tension is particularly awkward to shift. Once loose, muscles have greater mobility or range of movement (ROM) and you will get so much more out of any exercise. Using the roller to cool down, allows the muscles to gradually return blood supply to normal, reducing the heat effect and the likelihood of any damage.
Warming up and cooling down are essential parts of all workouts and not to be missed out or rushed no matter how much of a hurry you’re in. However, you should also keep in mind that failing to use your foam roller correctly can cause serious harm. Here are a few mistakes to avoid:
- Do not roll too fast because doing it quickly is not going to help eliminate any adhesions whatsoever. The idea is to help your brain focus on those trigger points and signal your muscles to relax more. Going slower will give the superficial layers and muscles time to adapt, which in turn will help eliminate tender spots.
- Do not spend too much time trying to clear those knots, as it is going to cause serious damage, especially when you do not mind putting your entire body weight on the roller. Never put sustained pressure on a tender spot, as it can damage muscle fibers, and instead spend no more than 20 seconds on a tender spot when using a roller. If you feel relief, you should consider 30 seconds the upper limit.
- Do not compromise on your posture or else a good exercise like foam rolling will become a bane. You need to use your arms correctly to support your body weight while using all the foam rolling moves.
It all boils down to the fact that foam rolling can really help relieve stress and prevent injuries, but you need to be doing those moves correctly, which is why it makes sense to work with an experienced personal trainer to get good results in an injury-free way.


